SOLIDWORKS Task Scheduler {Part 4}
SOLIDWORKS Task Scheduler, in last blog we discussed about Create Drawings, Convert to High Quality Views and Create eDrawings.
In this blog we will focus on the
- Design Checker
- Update Simulation
Searching for Task Scheduler from Start menu > All Programs > SOLIDWORKS 20__ > SOLIDWORKS Tools > SOLIDWORKS Task Scheduler.
Refer Link:-
- SOLIDWORKS Task Scheduler {Part 1}
- SOLIDWORKS Task Scheduler {Part 2}
- SOLIDWORKS Task Scheduler {Part 3}
SOLIDWORKS Task Scheduler allows you to capture your drafting and modelling standards into a simple user interface. Then use these rules to check against your completed files to find little mistakes where the drawing didn’t quite follow the company’s rule
Simulation of Part or Assembly takes time for generating report. Update Simulation generates all results in idle time and saves your time.
-
Design Checker
What it is?
Auto Check designs using a standard file generated with design checker to minimizing the common errors.
Why?
- Streamlines design release process
- Ensures accuracy, completeness and standard compliance’s
- Runs standard checks in batch mode
- Auto correct errors
Know More
Design checker captures your standard drafting and modelling into a simple user interface then uses these standard to check against created files to find little mistakes.
Sometimes user might find that somethings has been changed on the title block. Any changes in title block may results in opening drawing and applying sheet format to each file. This may result in efficiency of user
Best solution is to set a standard rule to check sheet format in use and runs.
Before starting procedure let us create Standard Design Checker File. (*.swstd file)
- Open SOLIDWORKS
- Go to Standard Tool Bar > Tools > Design Checker > Build Checks as shown in Fig 1
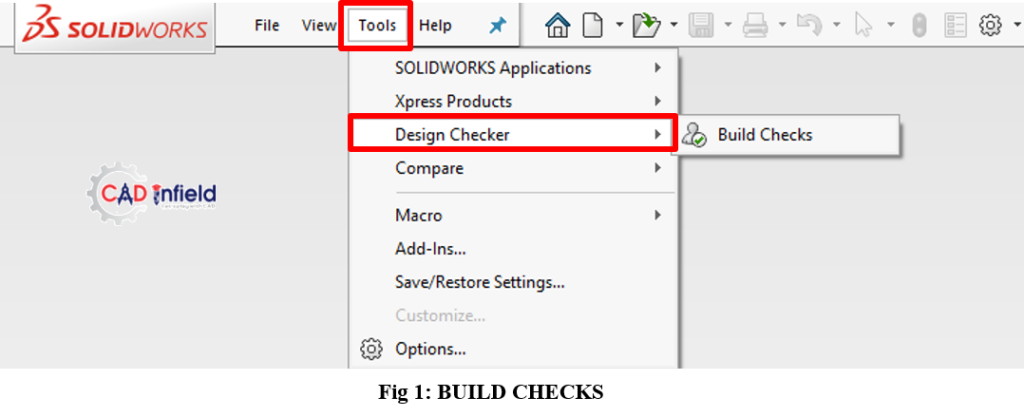
After Opening Build Check, we will get UI of Standard design checker. Create new Design Check as shown in Fig 2

- To set standard click on the checks, here are Dimensioning Standard, Arrow Style, Custom Property etc shown in Fig 3
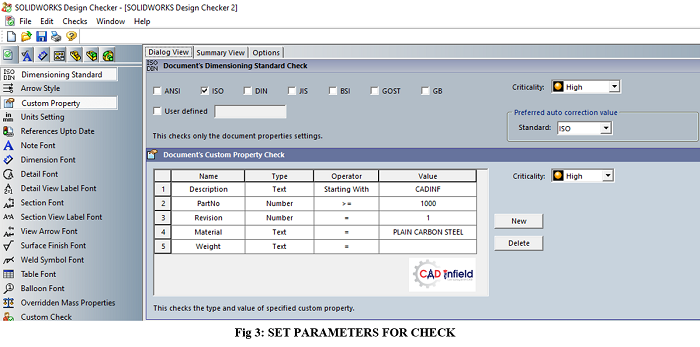
4. Set Standard Check for Document’s Custom Property, Document’s Units Setting, Document’s Note Font, Document’s Note Font, Document’s Detail Font, etc
Add parameter against which you want to check the properties.
- Save File as *.swstd in a location and remember this location. Shown in fig 4
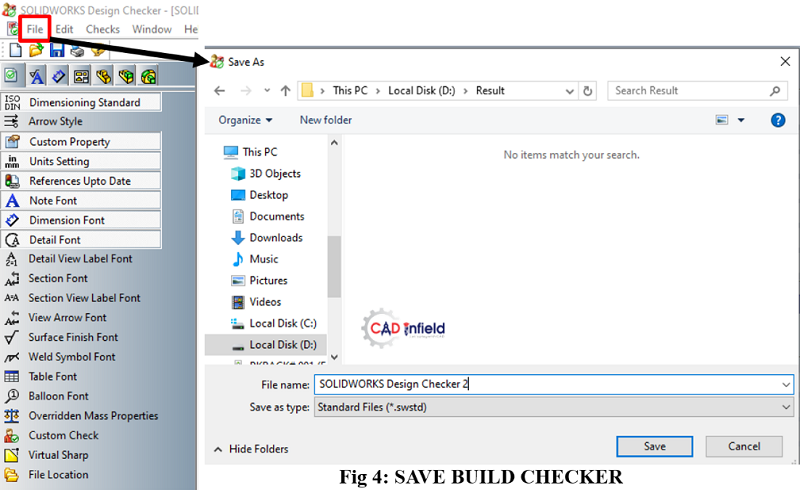
(**.swstd file location can be add through SW > File Location >Design Checker Files.)
Now Standard Design Checker is ready.
For Task execution Follow the steps
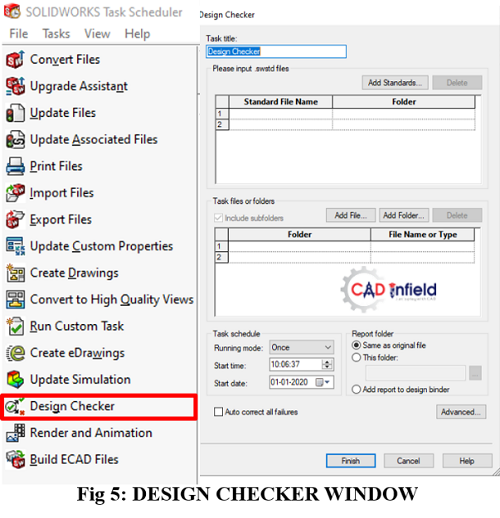
Step 1: Open Task Scheduler, Select Design Checker from Task sidebar. Window of Checker will pop up shown in fig 5
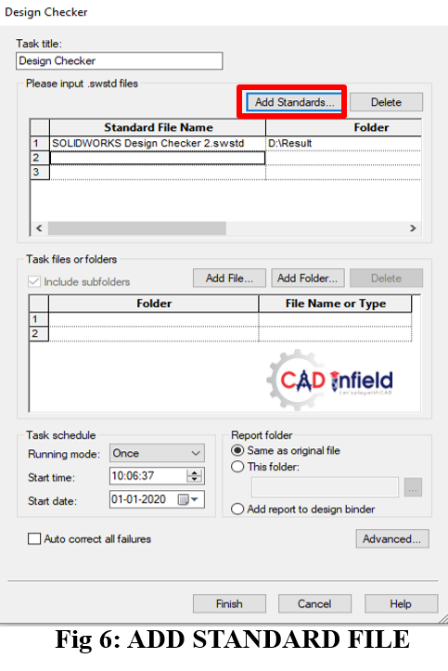
Step 2: Add created standard file (Browse for the file in location) shown in Fig 6
One can add multiple standard files for checking
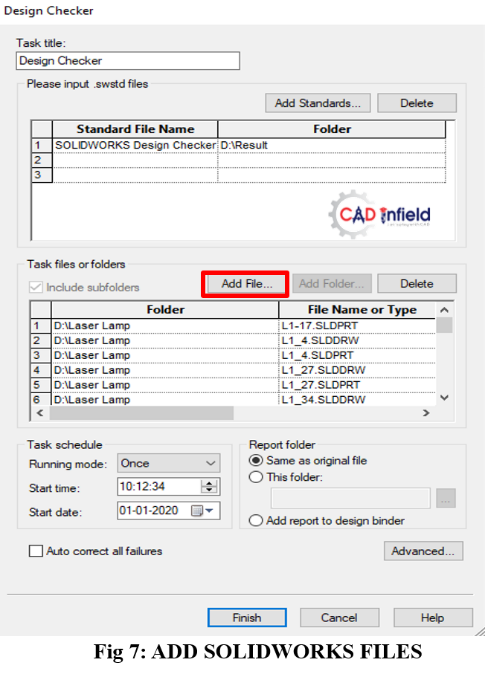
Step 3: Add files or folders which contains SOLIDWORKS files .Shown in fig 7 Can be run check for the Parts, Assembly and Drawing Documents. Adding files or folders is same procedure for all.
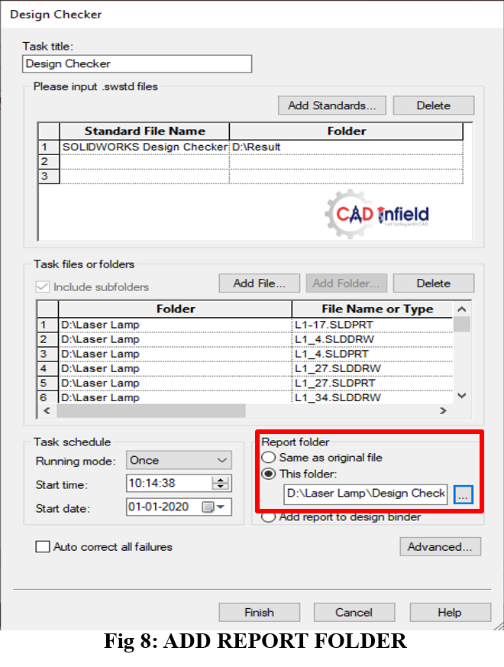
Step 4: Browse for the report folder. Report is comparison of standard file with created file. shown in fig 8
 Step 5: Set time for task and finish the Settings
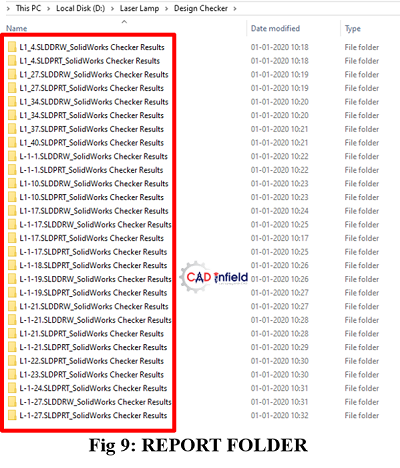
Report will generate after execution of task in report folder. Check that folder, Shown in fig 9
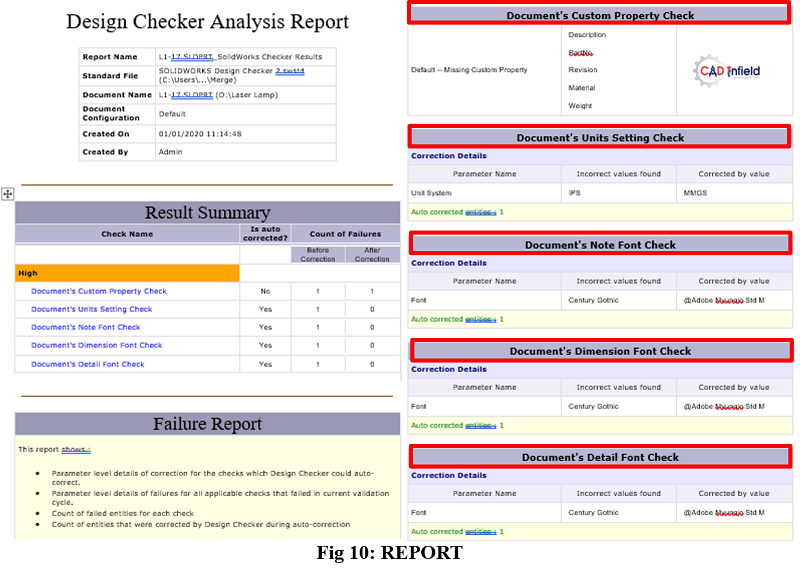
Report is comparison between standard file and created file. Shown in Fig 10
Design Checker can also auto correct the all parameters so its time saving process. Schedule task or weekly or monthly basis.
-
Update Simulation
What it is?
Schedule tasks to update the SOLIDWORKS Simulation analysis in SOLIDWORKS Part & Assembly documents
Why?
- Ensures Consistency
- Runs number of files simulation over night
Know More
Performing task such as rebuilding a large assembly could be time consuming. You can choose task on daily, weekly, monthly basis so that result will update regularly without fail.
So that it will let you to concentrate on another work and reduces human error.
Let, us take one example simulation of a part Support Bracket.
Follow the procedure

Step 1: Open Part in SOLIDWORKS
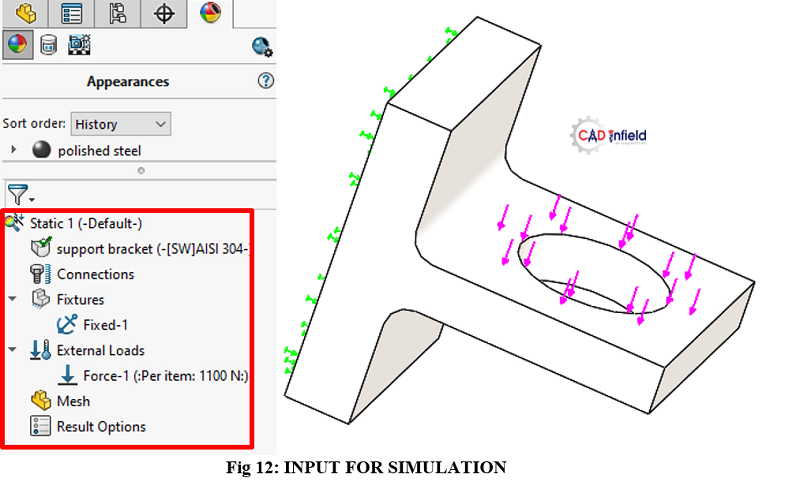
Step 2: Go to simulation > New study
Give input shown in fig 12
- Fixed Geometry
- Force
Save the part
Step 3: Open Task Scheduler, Select Update Simulation from Task Scheduler sidebar. Window of Checker will pop up shown in fig 13
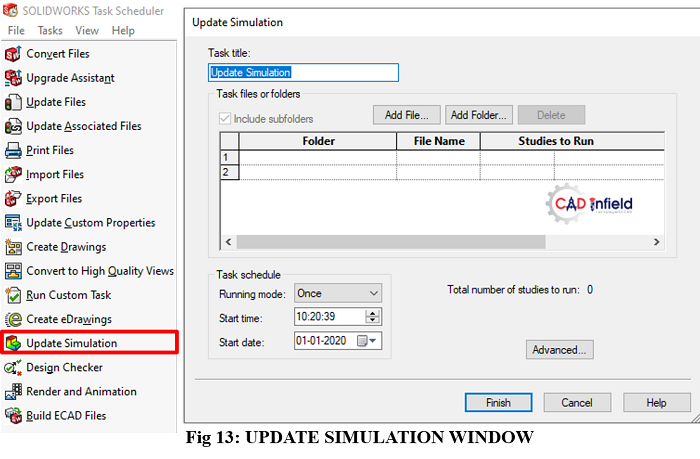
Step 4: Add file or folder in which files are present. Shown in Fig 14.
 Set time for execution and finish setting
Task Scheduler opens that files or files in that folder and calculates result at a specified time and overwrites (Saves with simulation results) the file.
It will take default mesh number.
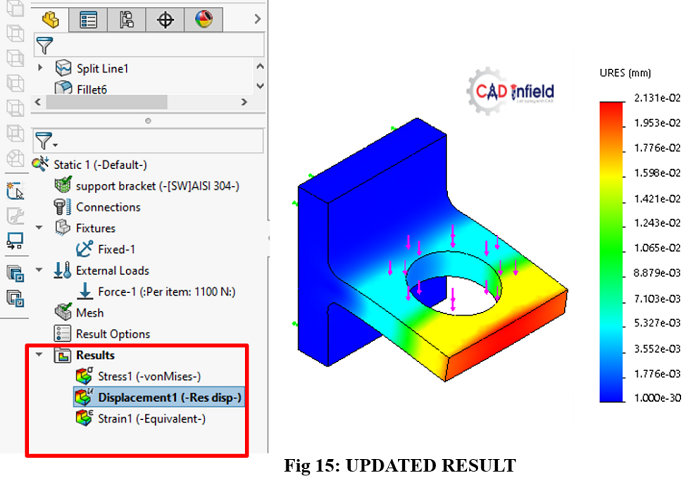
When you open the updated simulation part, you will get updated result.
Check completed task from task scheduler window.
By this one can take number of studies of simulation.
Conclusion:
By this Design Checker increases accuracy of work and auto run of checks minimizes design errors and missing parameters.
Update Simulation is ultimate solution of time-consuming process of simulation. So that it increases the efficiency of designer.
Created by:
For more details contact: –
+91- 97301 40885
Certified SOLIDWORKS Expert & CAE Professional
CAD Training Institute in Pune
