SOLIDWORKS Task Scheduler, in last blog we discussed about Print files, Import File, Export Files and Update Custom Files.
In this blog we will focus on the
- Create Drawings
- Convert to High Quality Views
- Create eDrawings
Searching for Task Scheduler from Start menu > All Programs > SOLIDWORKS 20__ > SOLIDWORKS Tools > SOLIDWORKS Task Scheduler.
Create Drawing is useful when you have large number of parts having similar drafting standards like template, views and annotation style so by using predefined template auto drawings can be created. Sometimes drafting views may not appear clear the quality of drafting view can update with high quality.
eDrawing is a tool which is compactible on mobile also so creating eDrawings for communication is best suitable for increase productivity. Creating eDrawings of model can automated in SOLIDWORKS Task Scheduler.
- Create Drawings
What it is?
Schedule tasks to create drawing files for SOLIDWORKS part and assembly files.
Why?
- Auto view placement
- Number of drawings in single setting
- Saves Time
Know More
If you want to speed up the process of creating SOLIDWORKS drawings, the SOLIDWORKS Task Scheduler is a great tool.
It reduces your time of adjusting views for every drawing, font size and all other annotations.
**Before Scheduling Task, we need to create a drawing template with a series of pre-defined views and make settings of auto dimensioning.
Continue with SOLIDWORKS
- Create blank drawing sheet.
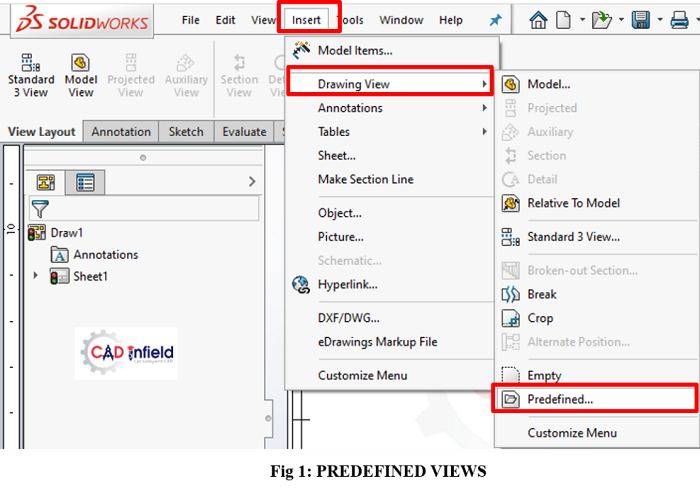
- Go to Insert>Drawing Views>Predefined. shown in fig 1
- Place your first view on the drawing view
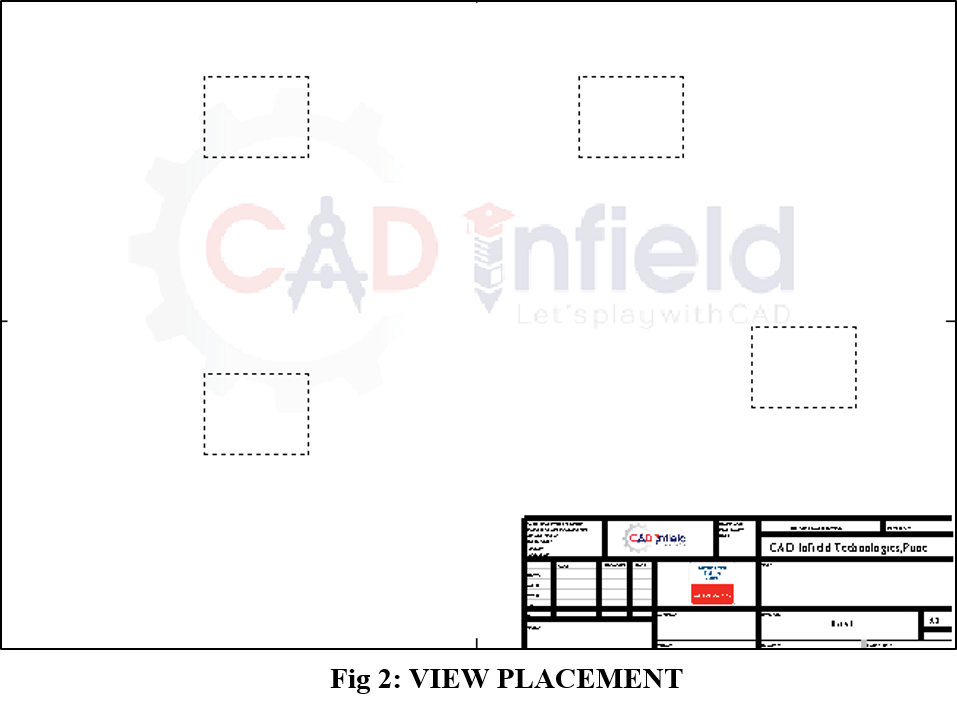
- Set the Projected View command to insert the remaining views that you want. shown in fig 2
- Select the orientation in the property manager, then use the alignment from right-click menu in the view.
Note: the predefined view command is not on the command manager by default – it’s under Insert > Drawing View > Predefined (or use the command search).
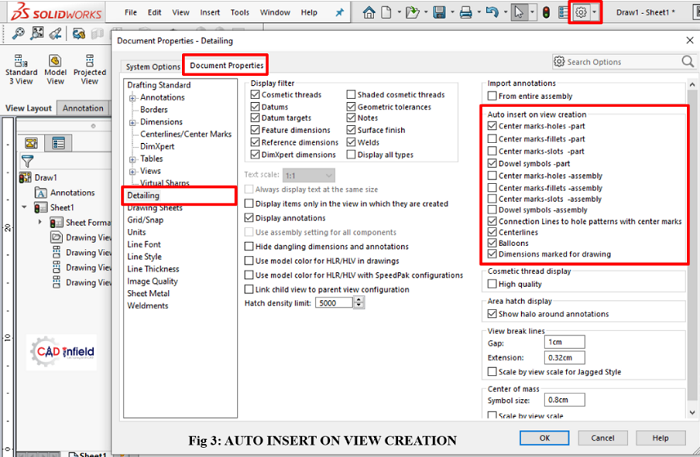
- Select Document Settings like Center mark, center line, dimensions, etc
Do all required settings from here shown in fig 3
- Save template in any location. (Here named Predefined Template)
Now let us follow the procedure for task.
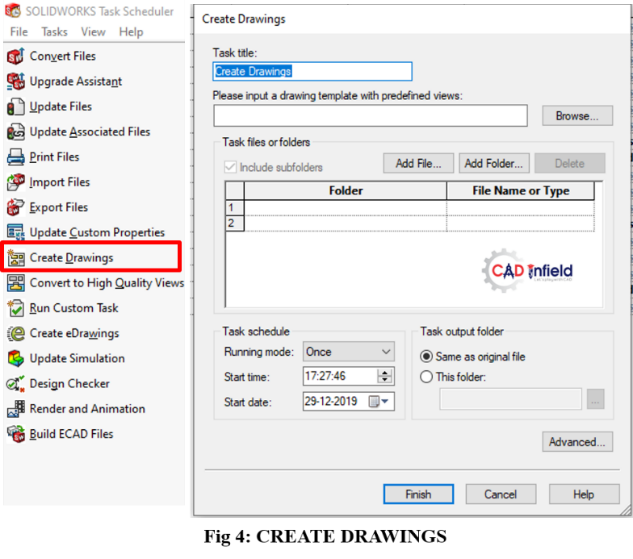
Step 1- Click on Create Drawings from the task sidebar of task scheduler. As shown in fig 4
Step 2- Browse for the Template saved with predefined views.
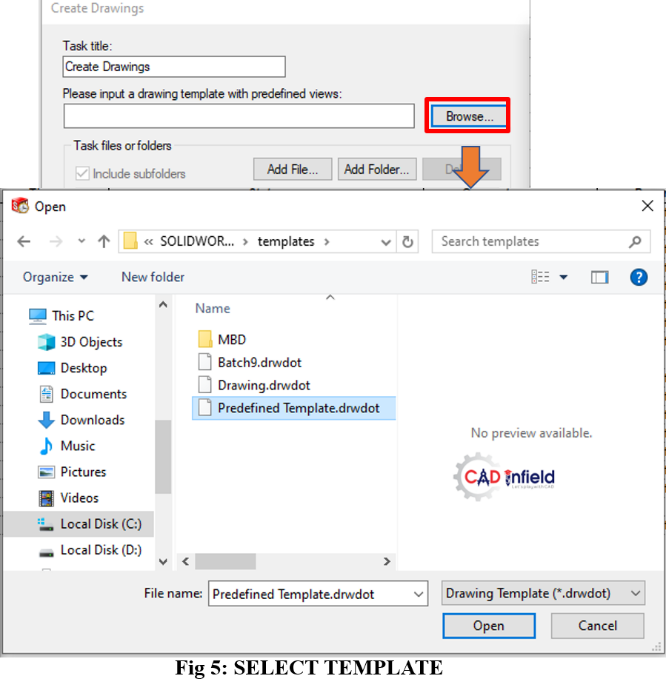 Step 3- Add file or folder and add output folder. Shown in fig 6
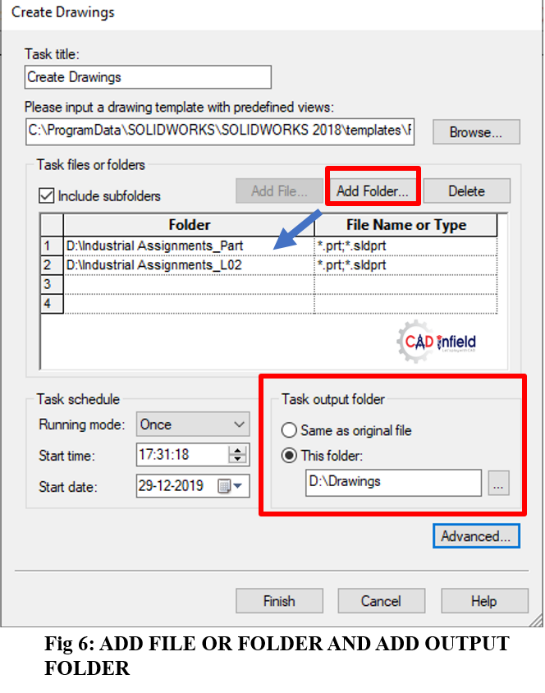
You can specify one or more files or folders, but you cannot specify both files and folders in the same task.
Step 4- Set Time for schedule and finish task.
After execution of task, predefined views and auto dimensions are created. Shown in fig 7
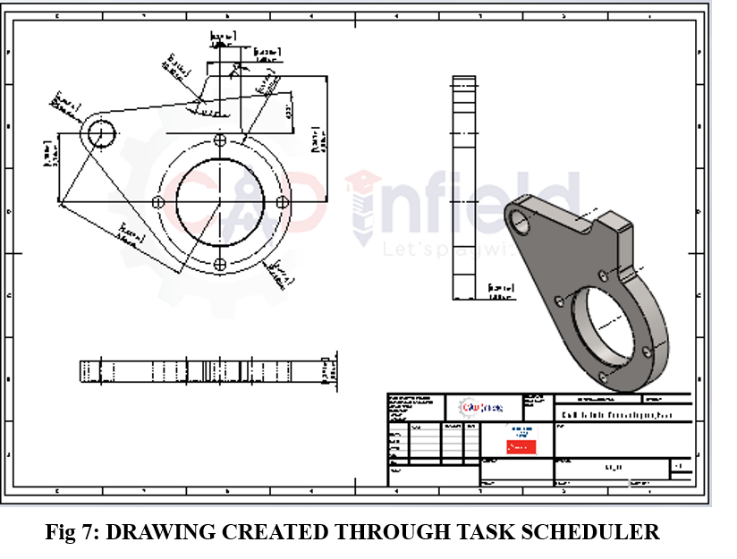
Status of completed task is available in task scheduler window.
-
Convert to High Quality Views
What it is?
Schedule tasks to convert the views in SOLIDWORKS drawings from draft quality to high quality.
Why?
- Convert draft quality to high quality
- Saves Time
Know More
In draft quality mode SOLIDWORKS drawing edges may appear to be missing & print quality may be slightly degraded, So it is necessary to convert or save drafting in high quality mode. Sometimes, you
may forget to change quality during drafting, it may create quality problem in printing drawings, so number of files can be converting into high quality in task scheduler.

You will find out quality view setting from SOLIDWORKS SETTINGS > System Options > Display Style shown in fig 8
Follow the steps for execution of task.
Step 1- Click on Convert to High Quality View from the task sidebar of task scheduler. As shown in fig 9

Step 2- Add number files OR add number of folders which contains drafting files. and set time Shown in fig 10 (By default it only selects *.sldrw, *.drw files only)
And end task
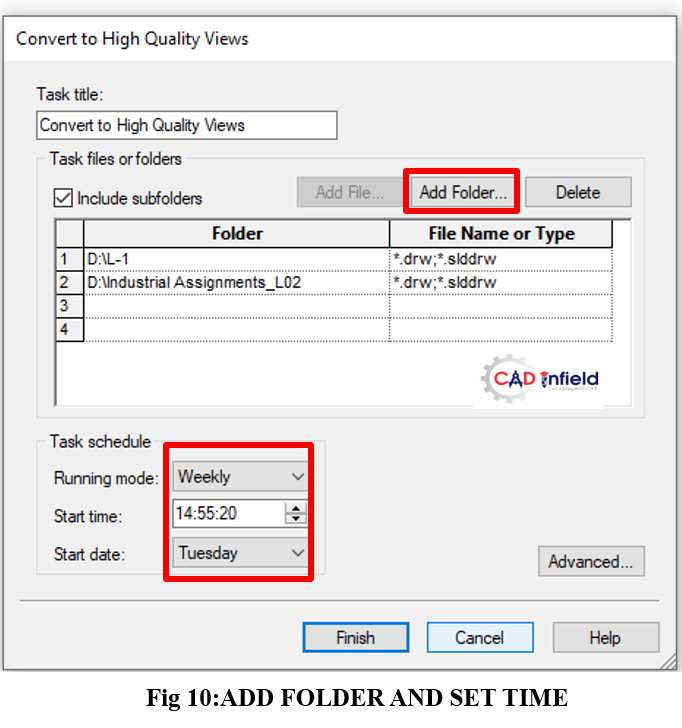
Drawing files from the selected folder will get updated with High Quality view after execution of task.
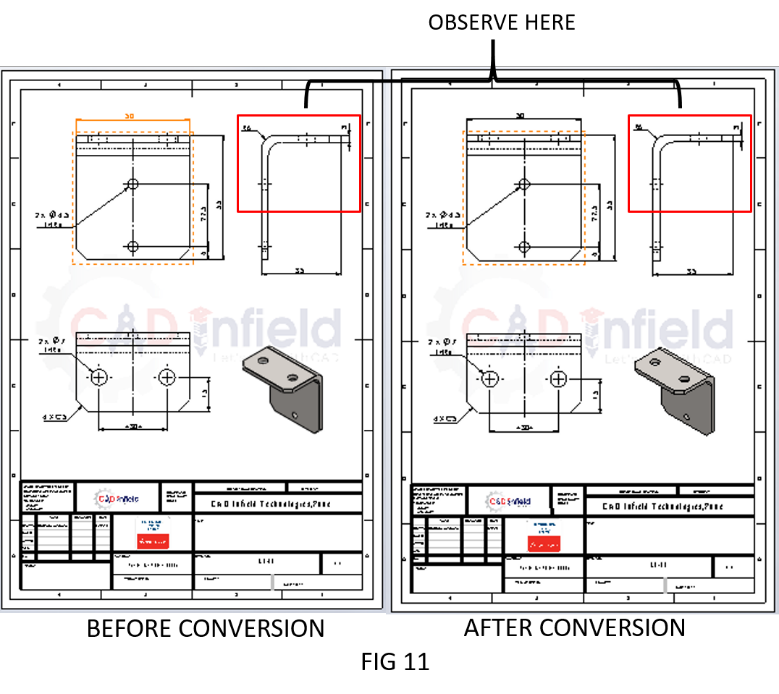
You will observe following change in view quality shown in fig 11
-
Create eDrawings
What it is?
Schedule tasks to export SOLIDWORKS document as eDrawings files.
Why?
- Saves times and efforts
- Automates Design Procedure
Know More
eDrawing is premier 2D & 3D design communication tool for internal and external design teams. One of the many capabilities of SOLIDWORKS Task Scheduler is being able to convert SOLIDWORKS part, Assembly and Drawing files to eDrawing files.
This task scheduler converts & saves your efforts.
Let us focus how it works
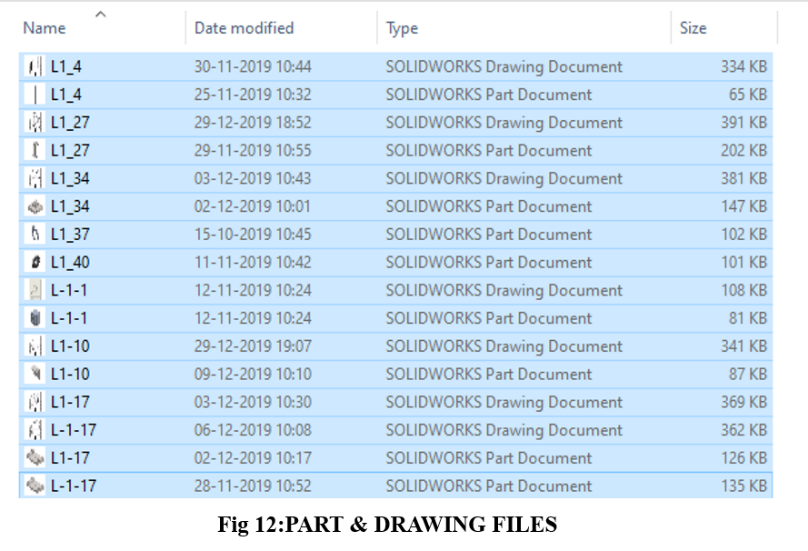
Example : Convert Following files into eDrawing files
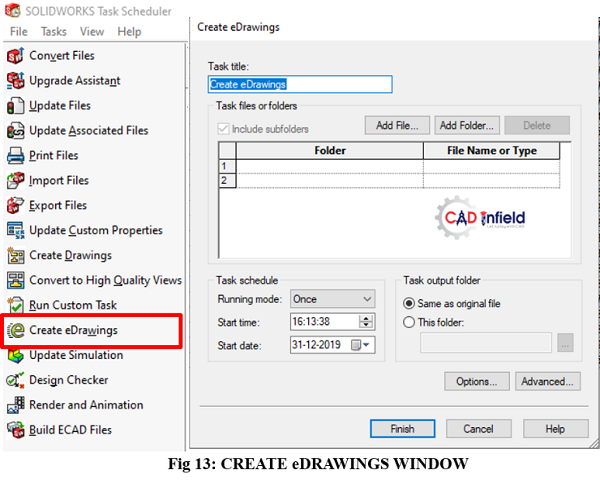
Step 1- Click on Create eDrawings from the task sidebar of task scheduler. As shown in fig 13
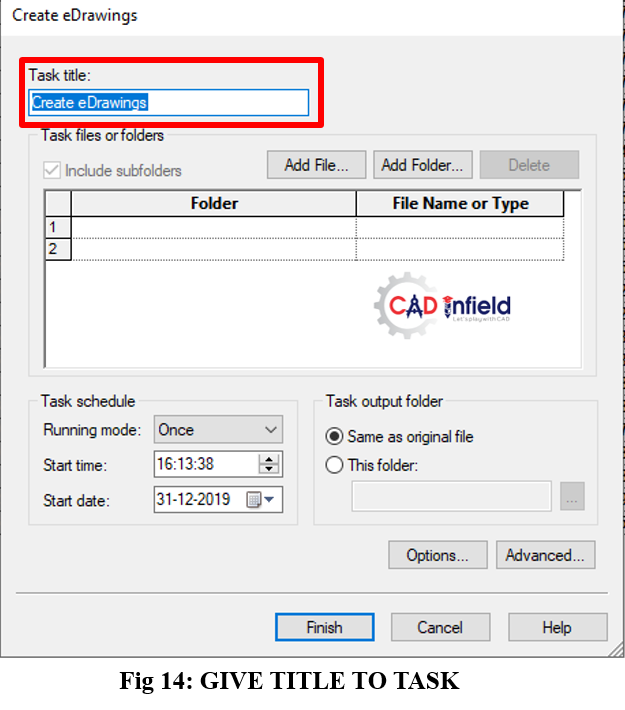
Step 2- Name the Task Title or leave default name. As shown in fig 14
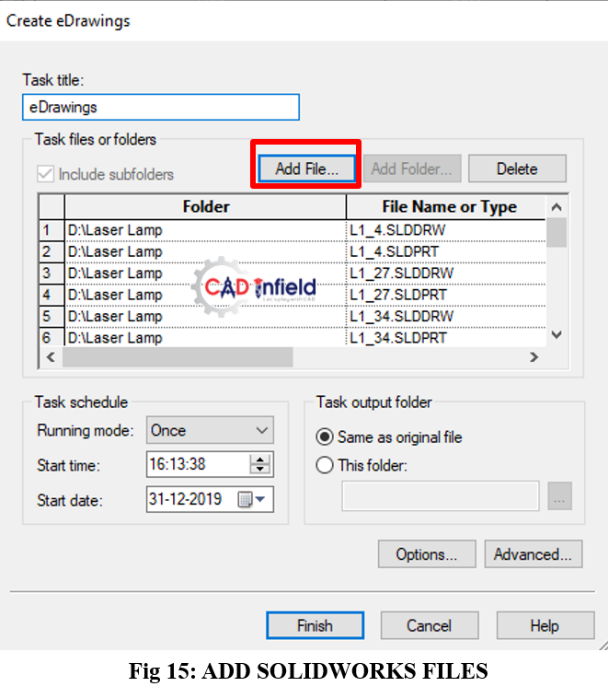
Step 3- Add files or folders. You can add number of files or number of folders but cannot add both in one task. Shown in fig 15
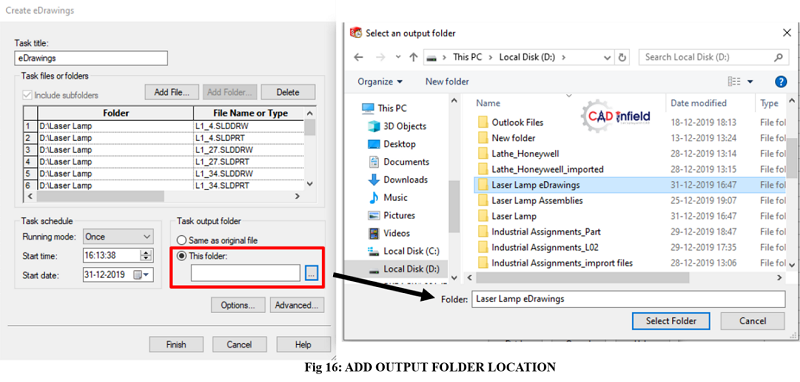
Step 4- Give output folder location. i.e. where eDrawing files will save. One can select the Same as original file location. Shown in fig 16.
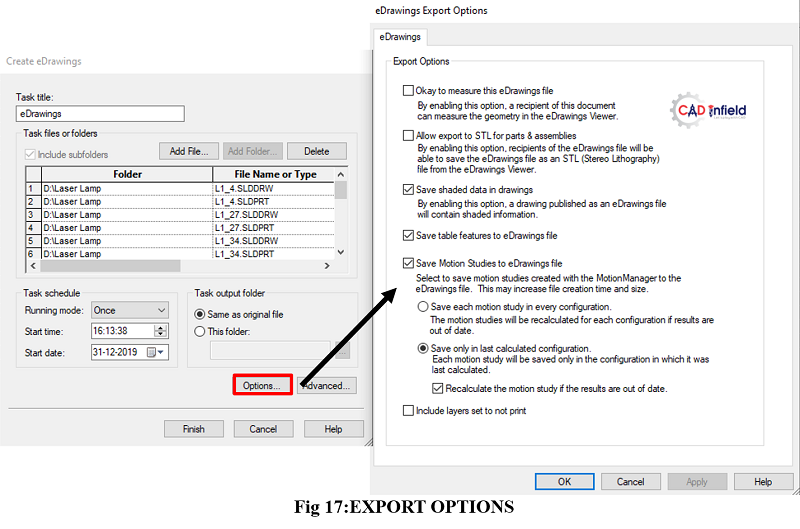
Step 5- Select on option for eDrawing Export Option and do the required settings. As shown in fig 17.
Step 6- Schedule a task by setting time and finish the setting.
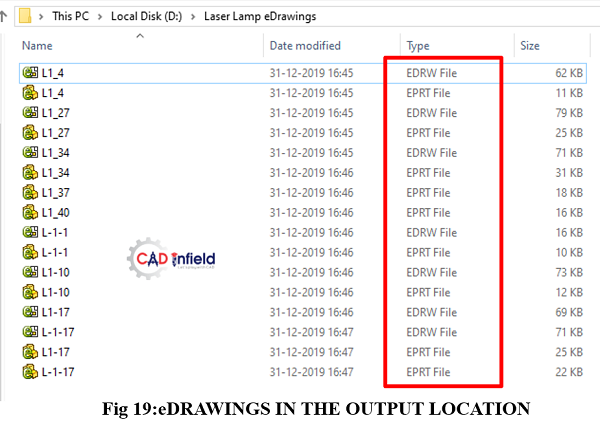
Step 7- Check the task after execution. You will find out the created files of the eDrawings.
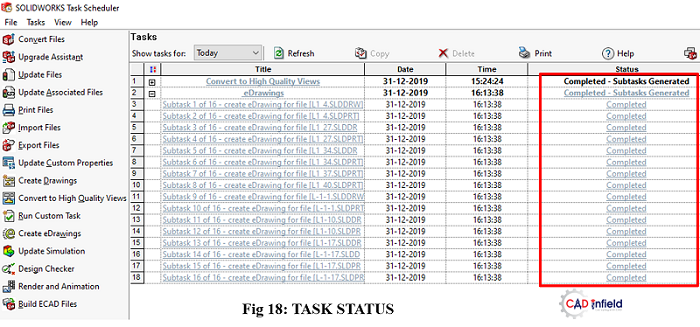
- Check Task status from Task Scheduler Window shown in fig 18
- Check from the output file folder. Shown in fig 19
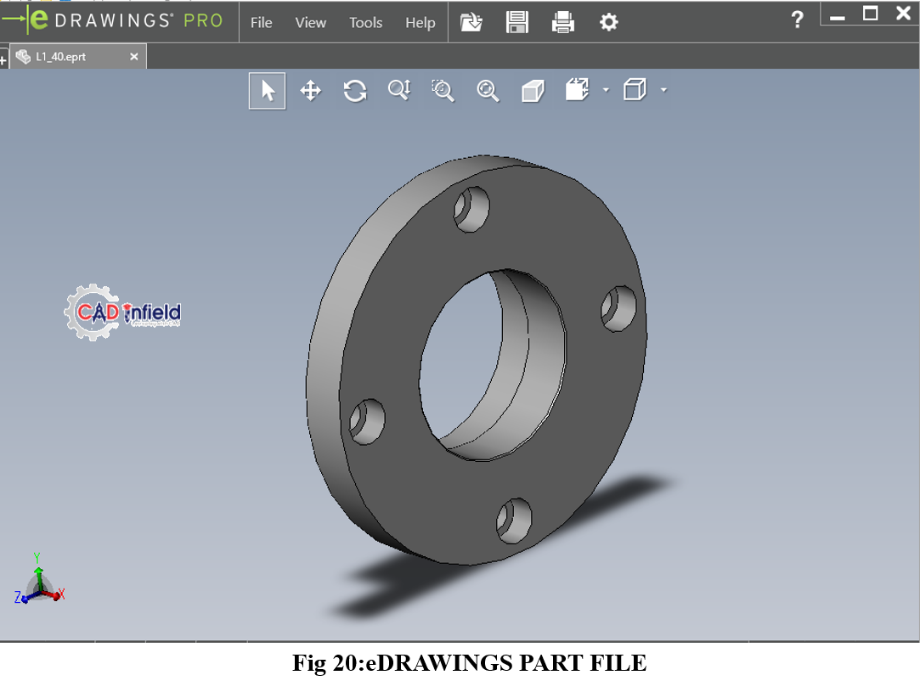
- Open the eDrawing file.shown in fig 20
Conclusion:
Creating drawings in a predefined way is time saving process and number of files can be created in idle time. Converting draft quality view in high quality view is most useful and reduces error. Also, eDrawings creation time of SOLIDWORKS Part, Assembly and Drawing files can be automated to save efforts and time.
Created by:
For more details contact: –
+91- 97301 40885
