
SOLIDWORKS Task Scheduler easy way to reduce manual task
In last blog we discussed about Convert File, Update File, Update Associated Files.
Traditionally you must do opening of files and then save as that file in SOLIDWORKS Part or Drawing file.
This is time consuming task and boring task.
In this blog we will focus on the
- Print Files
- Import Files
- Export Files
- Update Custom Properties
Searching for Task Scheduler from Start menu > All Programs > SOLIDWORKS 20__ > SOLIDWORKS Tools > SOLIDWORKS Task Scheduler.
You can also choose to use a document’s saved printer settings for each print task.
-
Print Files
What it is?
Auto print of the drawings for further work is automated by single setting.
Why?
- Settings for number of files at once will reduce time
- Improves Performance
- Streamlines Workflow
Know More
Task will let you print a group of files later; many companies use old drawings print for reference and stores with them so that they could have a hard copy of the drawing information, this gives you a backup that will not be lost with a hard drive crash.
Also Print of drawings are needed to shop floor for manufacture. So, it is very important to take regular print after release of your document.
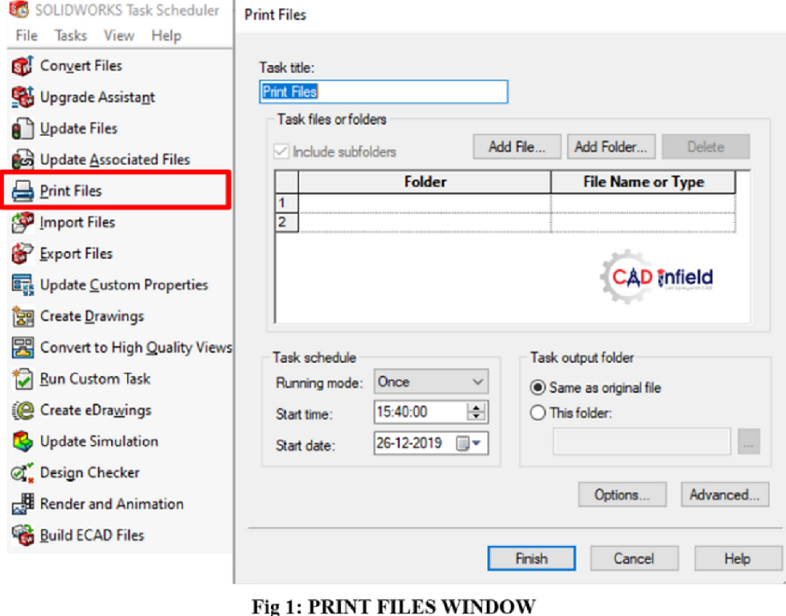
Step 1- Click on Print files. As shown in fig 1 Window of Print files will display on screen.
Step 2- Add File or folder to give location of file. Shown in fig 2
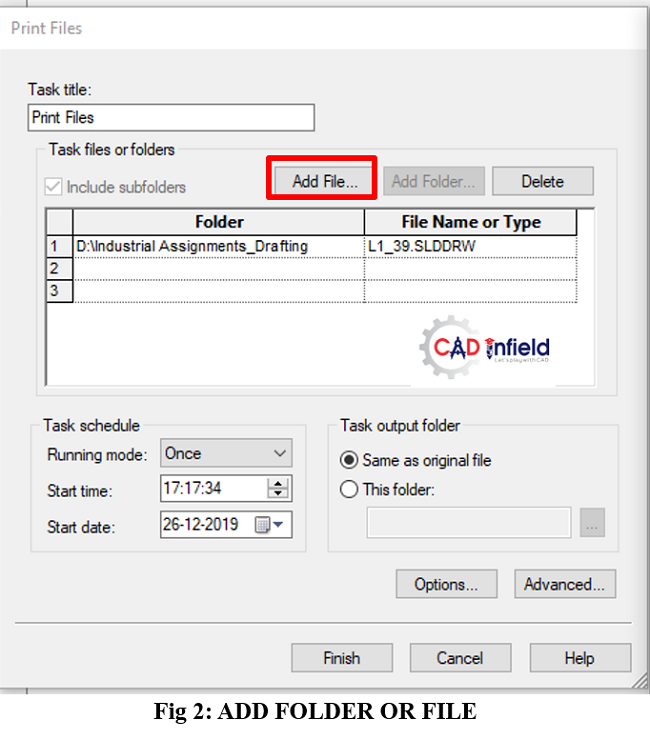 Add Files
- Click add files
- Browse for the file to print
- Then click open
- Repeat steps to add more files
Add Folders
- Click add folders
- Browse for the folder and add folder
- Under File type give file extension to print file
- Repeat same procedure to add more folders
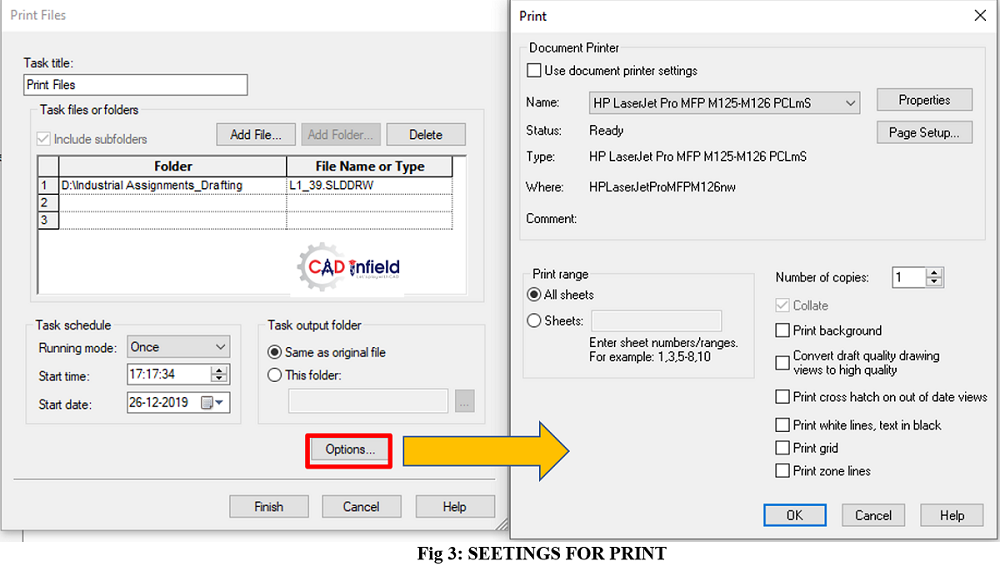
Step 3- Click on Options and do settings for print as sheet size, portrait or landscape, name of printer, number of copies, etc
These settings are time and will continue for scheduled task. Then click OK. Shown in Fig 3.
Step 4 – Set Running mode as once or weekly or monthly, time for printing and finish the task setting.
Task will be executed on a specified time.
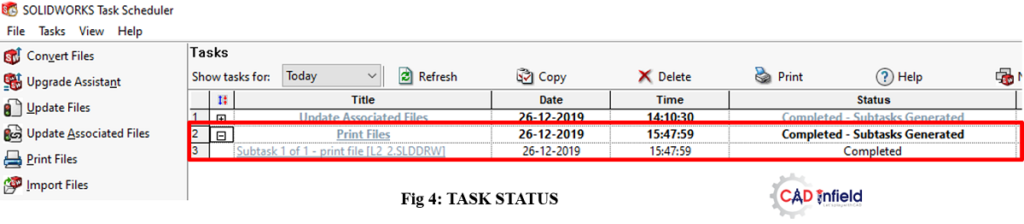
Step 5 – Check the completion of task in Task scheduler window. Shown in fig 4
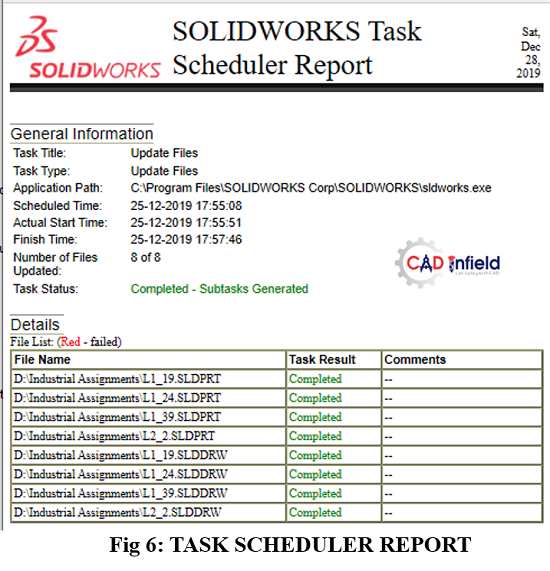
SOLIDWORKS Task Scheduler Report
SOLIDWORKS Task Scheduler Report includes General Information and Details about executed task.
How to see-
Open Task Scheduler > Double click on the status of task from task window as shown in fig 5

Report contains General Information about
- Task Title
- Task Type
- Application Path
- Scheduled time
- Actual Start Time
- Finish Time
- Number of files
- Task status
Details contains all File List as shown in fig 6
-
Import Files
What it is? –
Schedule task to import other files into SOLIDWORKS Files.
Why?
1.Reduces Repetitive Task
2.Improves Performance
3.Allows you to auto convert with time saving
Know More
Sometimes customer sends data in the standard file format. As all the customers have not the same software so they store file in standard file format. We use these files for the project as reference files. So, we have to convert files in the SOLIDWORKS file format. For that must open the file and save as in SOLIDWORKS File is time consuming for number of files. Task Scheduler allows you to set settings for auto conversion of files in SOLIDWORKS format.
Only 8 type of files can be import
- Parasolid – *.x_t; *.x_b; *.xmt_txt; *.xmt_bin
- IGES – *.igs; *.iges
- STEP – *.step; *.stp
- ACIS – *.sat
- VDAFS – *.vda
- SLDXML – *.sldxml
- Rhino – *.3dm
- DXF/DWG – *dxf; *.dwg
Let us see how it works
Step 1 – Click on the Import Files from the Task Sidebar shown in fig 7
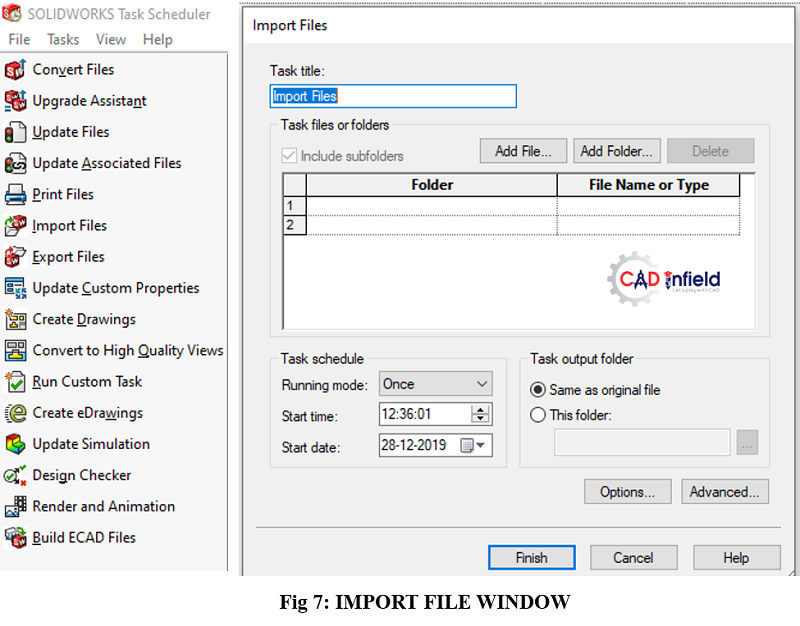
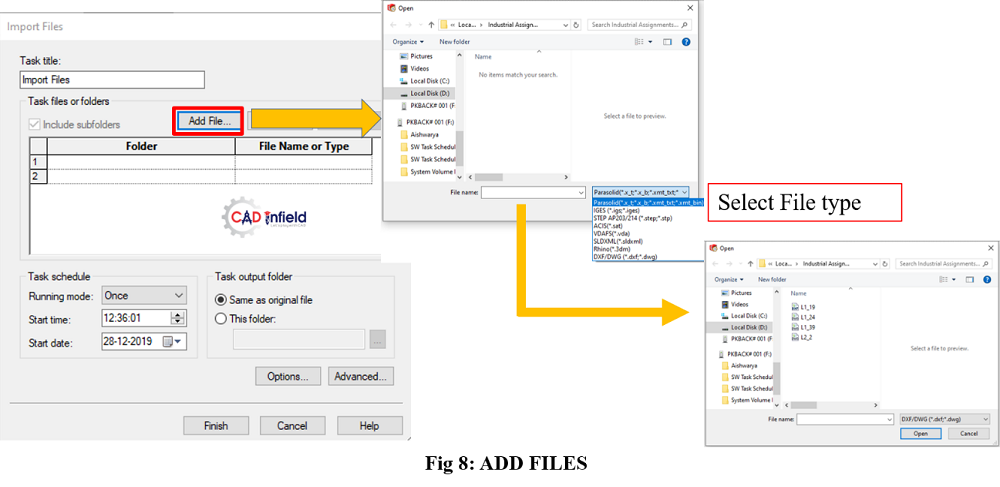
Step 2 – Add file or Add folder
You can specify one or more files or folders, but you cannot specify both files and folders in the same task. Shown in fig 8
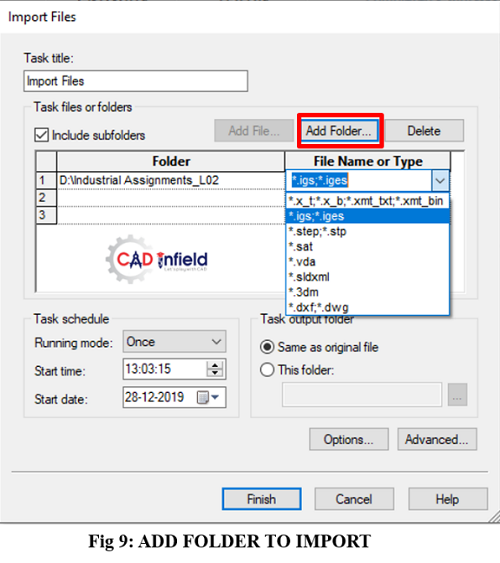
For adding folder, file type is to be mention shown in fig so that all file in that folder of that file extension will get imported. Shown in fig 9
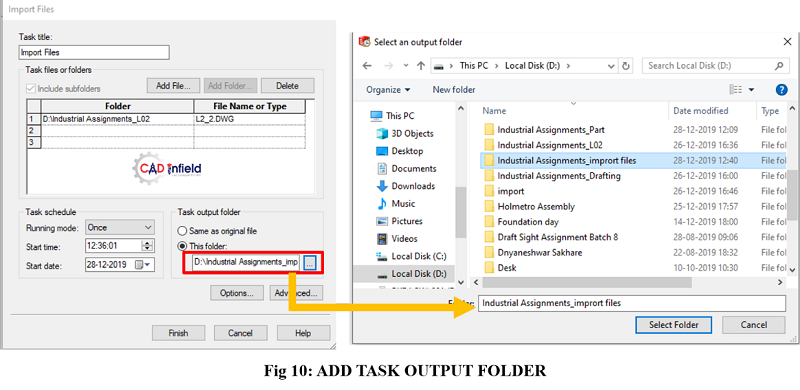
Step 3 – Add folder where all the output files will get stored. Shown in fig 10
Step 4 – Click on Options. Select Import to drawing from DXF/DWG Import shown in fig 11

- Surface/solid entities– Imports surface and solid entities
- Free point/curve entities– Imports free points and free-curve entities
- Perform full entity check and repair errors- Checks and repairs errors. With this option selected, import performance is slower because the software spends more time checking and repairing the model entities wherever possible
- Customize curve tolerance– Customizes the tolerance when you import models with small entities
- Unit– Sets the units of measure for the imported file
Select required option and click Ok. Task is scheduled.
Step 5 – Check completion of task. Shown in fig 12
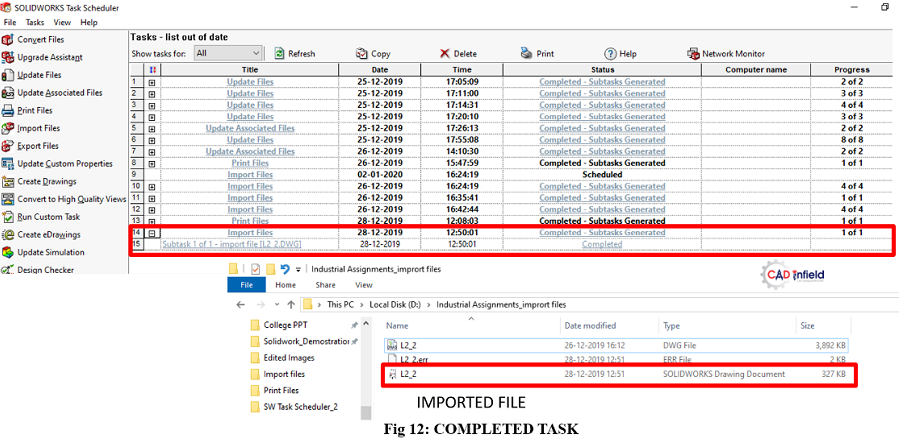
Finally Completed task will be observed in Task Scheduler window and file will available in location.
-
Export Files
What it is?-
Schedule task to Export SOLIDWORKS Files into another file format
Why?
- Settings for number of files at once will reduce time
- Improves Performance
- Streamlines Workflow
Know More
Conversion of SOLIDWORKS Drawing file in pdf for sharing is most common. Daily number of files releases and it is required to share it with production department, so exporting or saving drawing file in pdf is time consuming. Auto conversion of the drawing file into pdf will save your time and reduces repeated work.
SOLIDWORKS file will not open in some another 3D model software. So it must export into .step file or .igs file to make compatible for others software’s.
Auto Export in SOLIDWORKS Task Scheduler works accurate and saves time
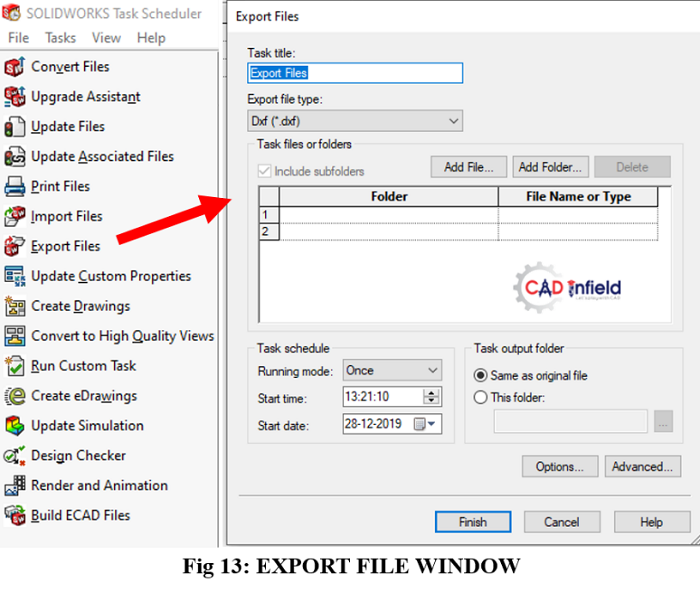
Step 1 – Open Task Scheduler and click on the Export File from the Task Sidebar. Shown in fig 13
Step 2 – Select File Type to Export SOLIDWORKS File. Shown in fig 14
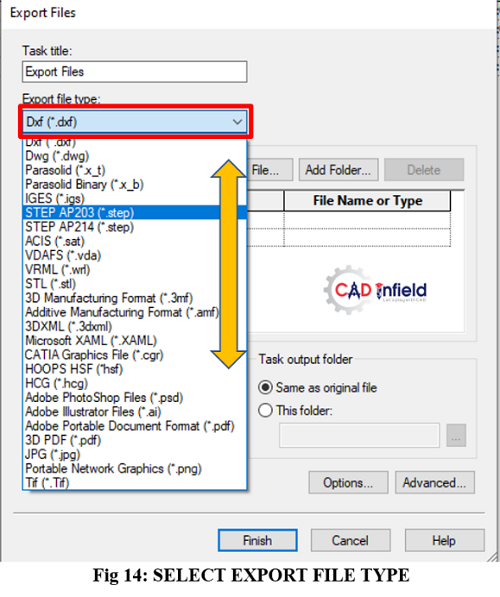
SOLIDWORKS Files are exported in following file types
- DXF (*.dxf)
- DWG (*.dwg)
- Parasolid (*.x_t)
- Parasolid Binary (*.x_b)
- IGES (*.igs)
- STEP AP203 (*.step)
- STEP AP214 (*.step)
- ACIS (*.sat)
- VDAFS (*.vda)
- VRML (*.wrl)
- STL (*.stl)
- 3D Manufacturing Format (*.3mf)
- Additive Manufacturing Format (*.amf)
- 3DXML (*.3dxml)
- Microsoft XAML (*.XAML)
- CATIA Graphics File (*.cgr)
- TIF (*.tif)
- HOOPS HSF (*.hsf)
- HCG (*.hcg)
- Adobe PhotoShop Files (*.psd)
- Adobe Illustrator Files (*.ai)
- Adobe Portable Document Format (*.pdf)
- 3D PDF (*.pdf)
- JPG (*.jpg)
- Graphics (*.png)
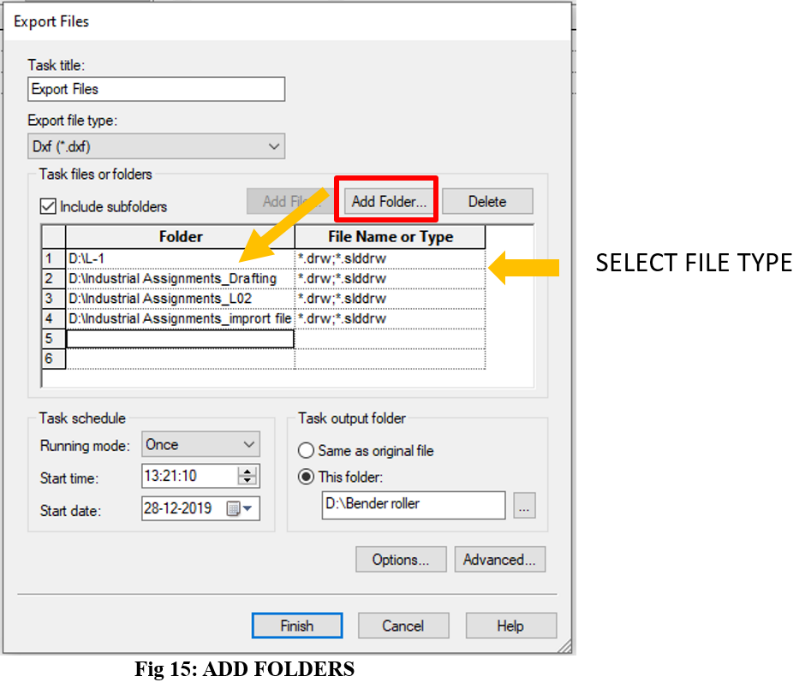
Step 3– Add folders and specify file extension of which files to exported shown in fig 15.
Step 4- Set Output file location from the Task output folder section (Refer Step 3 from Import file)
Step 5- Select Export Options. DXF/DWG option window will get open
Select version, font and line style
And click OK , Finish the task

Step 6 – Check completion of task. Shown in fig 17
Similarly, Export in PDF can be done.
- Update Custom Properties
What it is? –
Schedule task to update custom properties of SOLIDWORKS documents
Why?
- Avoids repetitive work
- Saves time
- Helps in BOM
Know More
Insertion of custom properties to the part, assembly is time consuming. Custom properties are important to link in drawing for the details about components.
It also allows you to create or modify existing custom properties for individual files, batches of files or entire folder.
Every time inserting property to each component is time consuming and manually insertion of proprieties may result in missing some properties because of human error
Best solution is to schedule property insertion for number of files in a single setting.
Ex.

Step 1 – Open Task Scheduler and click on the Update Custom Properties from the Task Sidebar. Shown in fig 18.
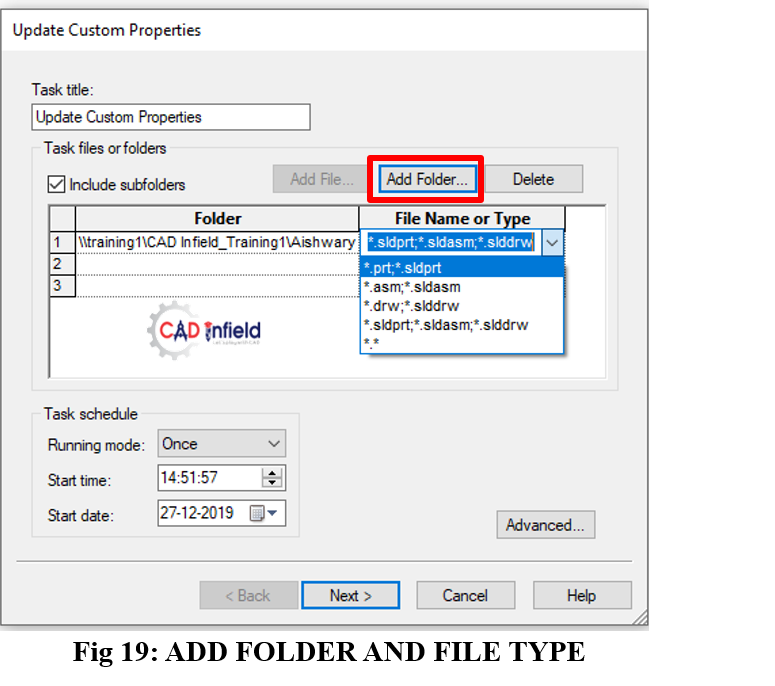
Step 2 – Add folders and file type of SOLIDWORKS part, assembly file. Shown in fig 19
Schedule a task (Set time, mode )
One can add multiple folders too.
Step 3 – Click on next.
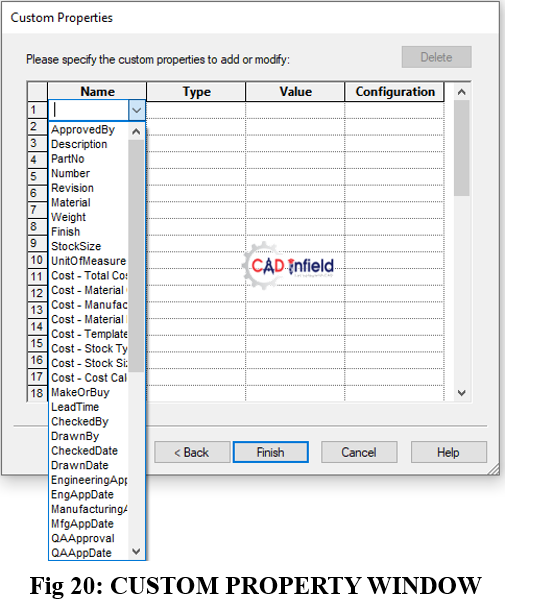
Custom Properties window will pop up. It contains 4 columns like the custom properties from SOLIDWORKS. Shown in fig 20
Name- Name will contains Property name
Type- It contains whether the property type is text, number, date or yes/no type.
Value- It contains the description of property
Configuration- Property to apply for a specific configuration Shown in fig 20
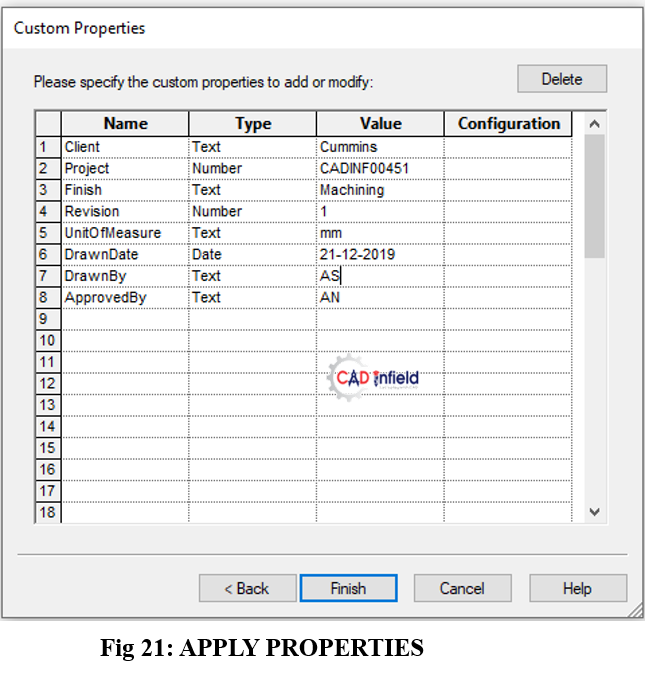
Step 4 – Insert all required properties as shown in fig 21
Finish the work
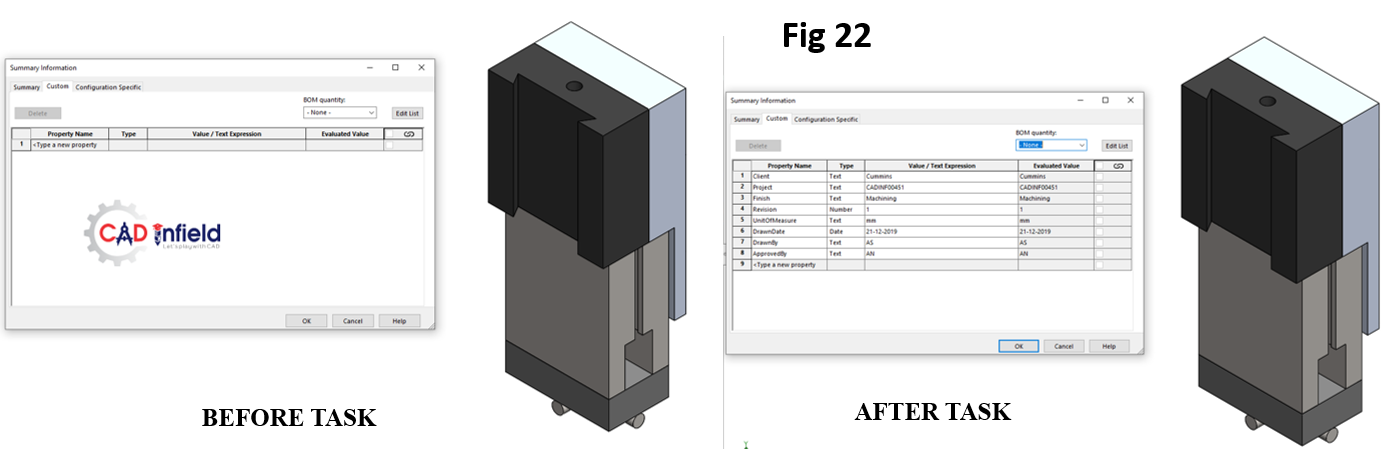
Step 5 – After execution of task, all properties are applied. Shown in fig 22
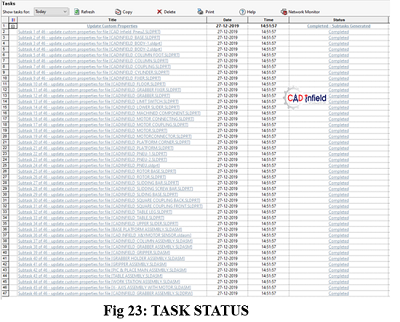
Step 6 – Check the Completion of task. Shown in fig 23
By this all the work will be automated to improve productivity.
Conclusion:
Manual task like insertion of custom properties to every component, conversion of drawing files to PDF of other standard file type, import/export of files and boring work of printer setting gets automated using Task Scheduler.
Created By-
For more details contact:
CAD Infield Technologies
+91- 97301 40885
Certified SOLIDWORKS Expert & CAE Professional
aatmling@cadinfield.com
CAD Training Institute in Pune