While planning the assembly and disassembly sequence plays a critical role when optimizing the production, maintenance and recycling of products.
An exploded view shows the relationship or order of assembly of various parts. It shows the components of an object slightly separated by distance
Exploding an assembly view in SOLIDWORKS can make all the difference when trying to show every component involved in the making. Instead of showing multiple views and angles, one view can be used to show all components.
Exploded views are used in almost every industry when it comes to explaining a product and how it works. Knowing how to use the exploded view feature is a crucial key feature and will be finishing touch needed when showing an assembly.
To create an Exploded View:
- Open Assembly
- Click on Exploded View from assembly or Search in Search tool
SOLIDWORKS Exploded View
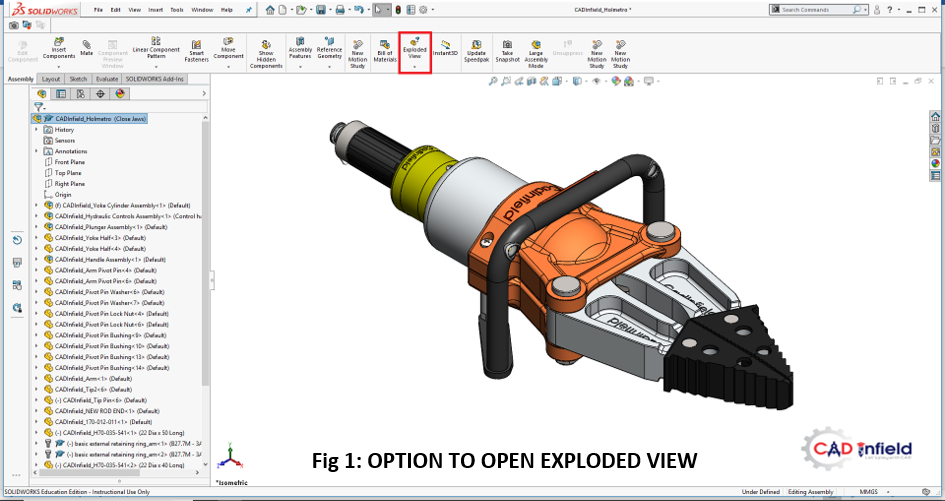
Once you clicked on Exploded View Command You will get Exploded View window as shown in fig2
Explode Step Type
- Regular Step- Evenly Space Exploded Stacks of components along x-axis, y-axis and z-axis
- Radial Step- Radially Explode Components about an axis
Explode Steps
Explode step includes flow of a component Exploded after spacing applied.
Settings
It Includes Explode Step Component (Working on Component to be Explode), Direction of Explode, Explode Distance (Spacing), Direction (Clockwise, Anticlockwise) and Rotation Angle
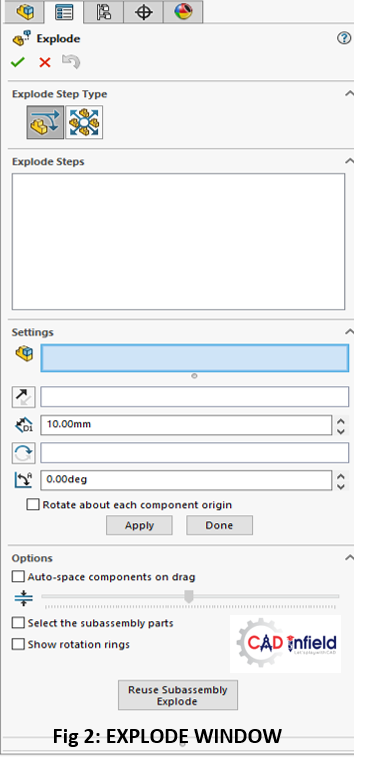
Option
It Includes Auto-Space Component on drag and to select subassembly parts for explode.
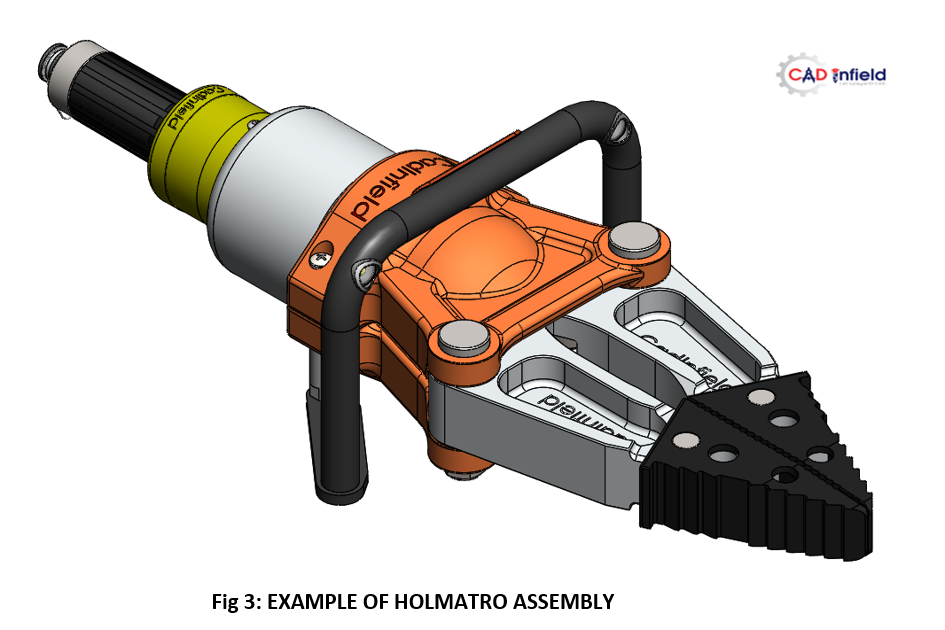
Example:
- Open Assembly then click on Exploded View Command
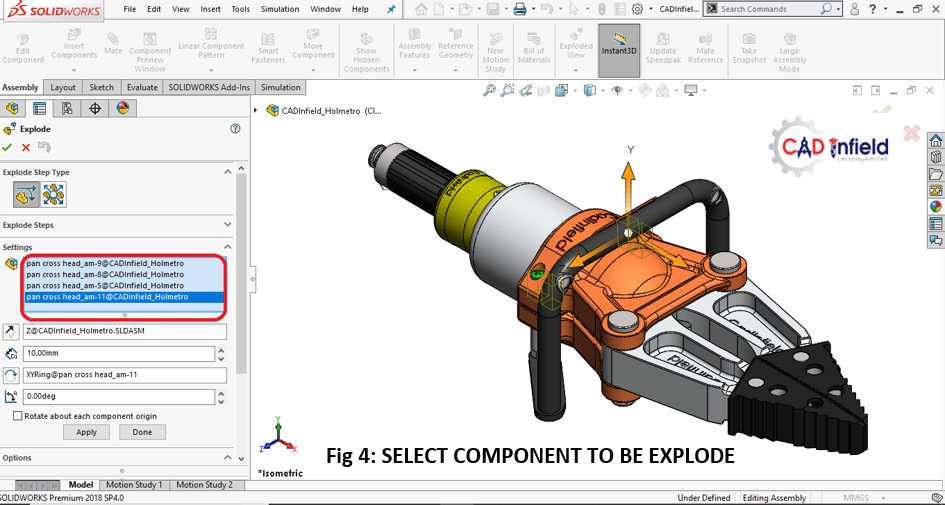
2. Select Component to be Spaced (Single component or multiple Components) as shown in fig 4.
Selected component will display in Feature design manager tree in settings
3. Drag the selected component in any one direction (X or Y or Z) if regular step from explode step type is selected.
Here, components are dragged in Y Direction.
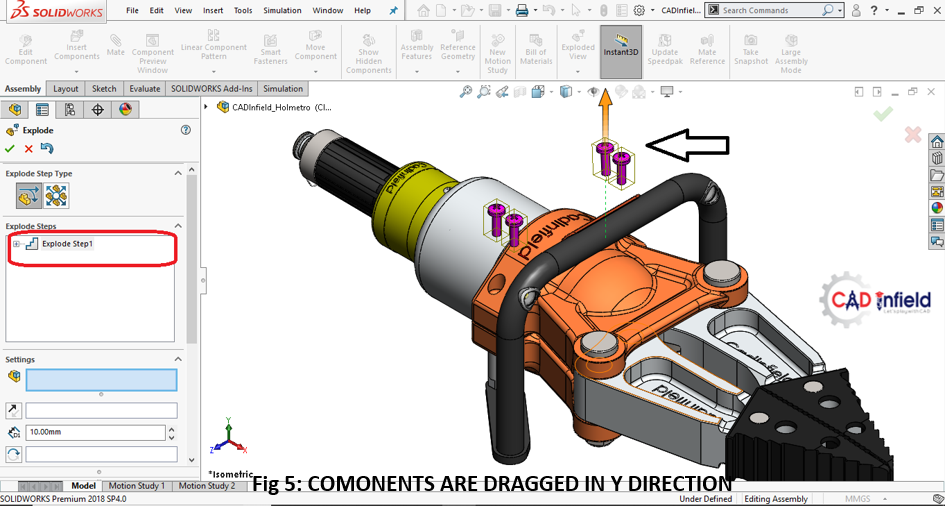
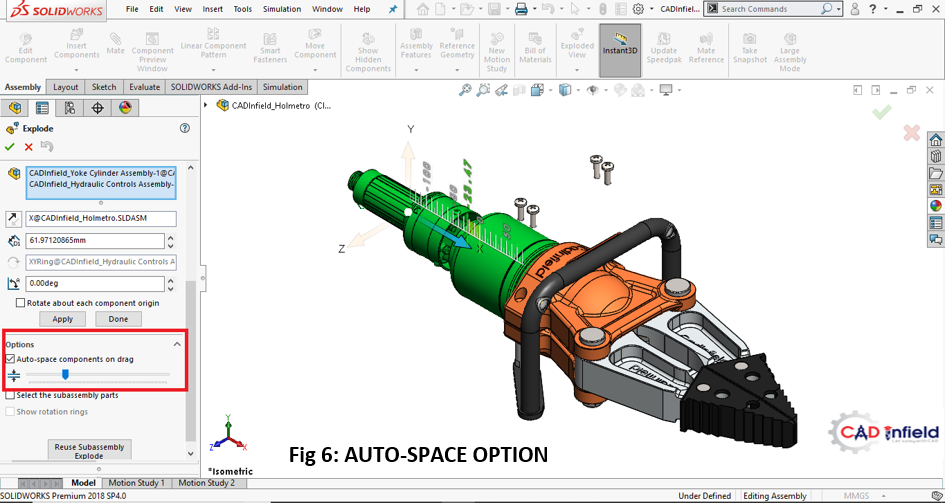
4. Select multiple components for auto spacing. Mark checkbox of Auto-Space components on drag and drag the components for auto spacing.
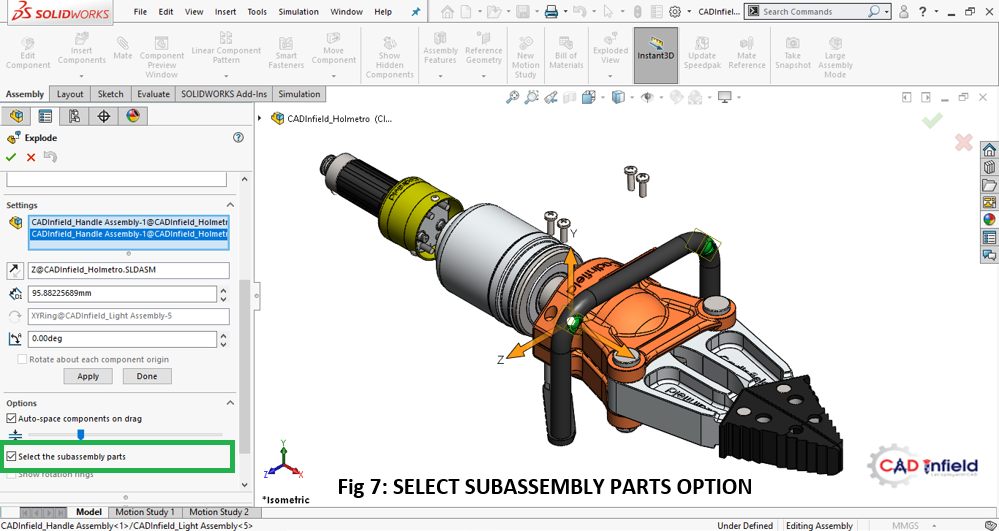
5. For separating the Subassembly parts. Make on option on Select the subassembly parts. So that subassembly parts can be Explode in Assembly Environment as shown in Fig 7
6. Arrange the Spacing between the parts according to convenient. Final Explode is given in the fig 8
Click on ok of Feature manager window of Exploded View Command.

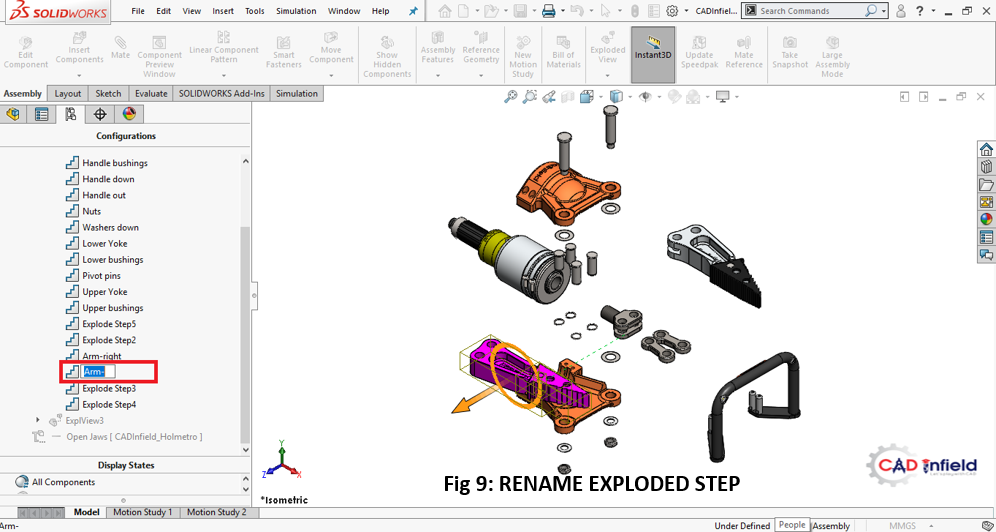
7. Renaming of Exploded View step is possible. Click Exploded view from Configuration manager tree. Select Exploded step to be Rename as shown in fig 9.
8. Go on Exploded view from Configuration manager tree. Right click and select Edit Feature. Then select Component and click on Reuse subassembly Explode (If want to Explode subassembly parts) Button from options of Explode Window as shown in fig 10.

9. Delete or Edit the Exploded Step.
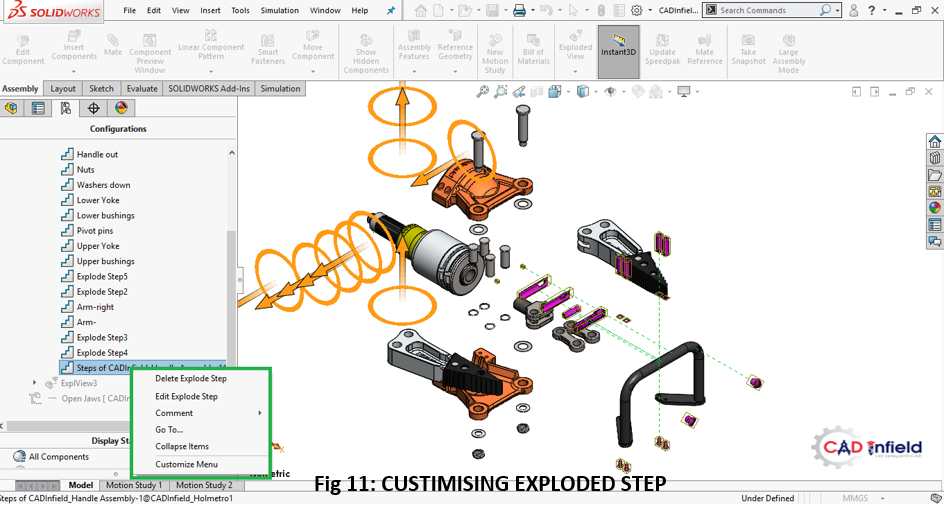
10. Animation of Collapse and Animation of Explode is Possible.
There are two methods to Animate the Explode.
Method 1–
Right Click on the Part from the Feature Manager Tree. There is an option of Animate Explode (If Exploded View is off) and Animate Collapse (if Explode View is Displayed) as shown in fig 12.

Method 2
Right click on Exploded view from configuration manager and select Animate Collapse or Animate explode as shown in fig 13

Animation wizard window will open and animation of explode and collapse will start

Created by:
For more details contact: –
+91- 97301 40885
Aatmling Narayanpure
Certified SOLIDWORKS Expert & CAE Professional
